Vineyard

Planting

As winter loosens its grip and spring approaches, excitement is in the air. It’s time to actuate your dream—time for Vineyard Planting! You’ve faithfully developed your vineyard planting plan, following the guidance on the Vineyard Planning page. The considerations below will assist with your first season of planting and caring for the vines.

This page provides a high-level overview of the components necessary to plant and care for a vineyard during the first season. The overview contains embedded internet links proffering term definitions. At the bottom of the page, there are curated topic blocks linked to sources covering additional vineyard planting details and considerations.

Stage 1 - Site Preparation and Equipment Readiness

The first stage in vineyard planting involves thorough site preparation. This includes ensuring that the land is ready, the necessary equipment is available, and the vines have been ordered.

Additionally, you’ll need to finalize your planting approach.

Your vineyard’s size, whether a few dozen plants or an acre or more, and specific site conditions will dictate your preparation methods. Critical tasks in this stage include confirming soil type and health, tilling the land (if needed), removing stones (if required), and mitigating vegetation or weeds as needed.

Be sure to have simple earth tools available, such as a sturdy shovel, a heavy digging bar (pointed on one end, blade on the other—breaks up hard earth and dislodges stones), a hard rake, and a wheel barrel, though a Gorilla Cart is best, maybe even a post hole digger.

Vineyard Planting - Digging Holes

Stage 2 - Planting the Vineyard

The second stage is the actual planting of your vineyard. Before the rootstock or vines arrive, decide how to dig the planting holes. This can be done by hand using a shovel or with mechanical tools like an auger, trencher, or backhoe. The choice depends on soil conditions, the number of vines, and your available resources.

Hand Digging: Suitable for smaller vineyards with manageable soil conditions. Test a few holes to confirm this approach.

Mechanical Digging is ideal for larger vineyards or more challenging soil conditions. A one—or two-person auger can make quick work of the task, while a backhoe affixed with an auger or small bucket might be necessary for rocky or heavy soil.

As a personal aside, I used a small backhoe loader with a 24″ auger attached (picture above) to dig the holes. The site contained a medium-high clay content with many small to medium-sized stones. The auger worked great because it provided plenty of room for young roots to spread.

You should also affirm how soil amendments might initially assist new root development while planting. For example, if a soil test illustrates a high clay content, you might want to add compost and/or organic amendments.

Stage 3 - First Growing Season Maintenance

The primary goal during the first growing season is root development, with above-ground vine growth ranging from 4 to 8 feet. Although a trellis system isn’t required in the first year, tall stakes (such as bamboo or rebar) support the young vines.

Three additional elements demand attention in the first year of vine growth.

Protect New Growth: Growth cones protect early vine growth from pests, both large and small, such as grasshoppers, caterpillars, rabbits, etc. This helps ensure that the vines can establish themselves without being damaged. Cones can be removed mid-to-late season if desired, allowing the vines to spread a bit more.

While you encourage as much new vine growth as possible during the first year, should small grape clusters appear along the vine (see photograph headlining this page), clip them off. A vine’s entire focus is vine and root development, not grapes.

Irrigation: If your area receives less than 24 inches of annual precipitation, supplemental watering is necessary—especially during the first year of growth. A drip irrigation system with a timer or additional zones in an existing system can provide consistent moisture. 

Weed Control: Establishing a weeding regime is crucial, as new vine roots shouldn’t have to compete with weeds.

While not required, ground cover crops can help control weeds, limit erosion, and promote soil health. However, when irrigating cover crops, be careful not to overwater the vines’ leaf canopies, which can lead to powdery mildew.

Vineyard Planting - mounded soil prepared for winter

Stage 4 - Winter Preparation and Protection

If you have planted grafted rootstock and your vineyard is in a cold-weather climate (winter temperatures commonly below 20°F), it’s vital to remove cones (if used) and mound soil along the base of the vines to protect the tender graft unions before winter. This step is not necessary in subsequent years unless you are in a region where temperatures can drop below -5°F.

An alternative to mounding soil is using plastic corrugated pipe at least 8 – 10″ in diameter, cut 12″ long. Slit each pipe length-wise so that they can be wrapped around the base of the vines. Then, fill with mulch.

For wildlife protection (deer, elk, skunks, bear, etc.), consider installing wildlife fencing before the end of the first season if your vineyard is prone to animal visits during the winter months. Additional deterrents such as noise and motion devices, including trapping are possible and can be effective, but a wildlife fence limits a greater percentage of unwanted guests.

Conclusion - Preparing for the Future

With proper first-season planting, maintenance, and winter protection, your dream vineyard will be well-positioned to thrive in the coming years. 

Winter is an excellent time to reflect on the first season’s lessons and refine your plans for the second year of growth.

For more detailed guidance, explore the online resources linked below, which cover various aspects of first-year vineyard establishment.

Boots in the Vineyard

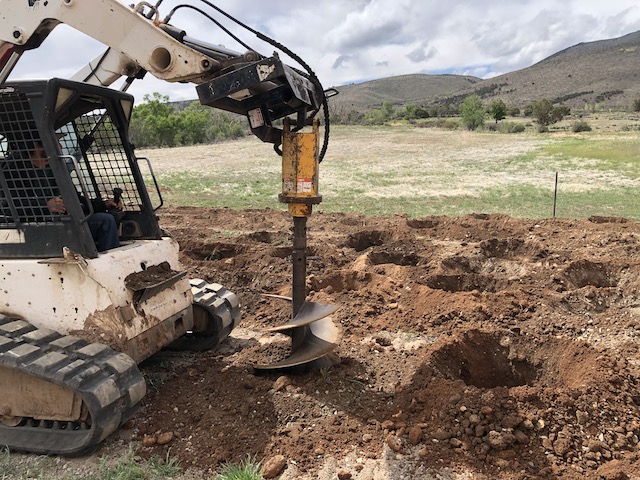
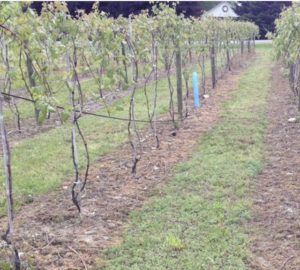
Vineyard Site Preparation (Cornell Cooperative Extension)

After selection of a good site, proper site preparation is one of the most important factors in the ultimate success or failure of a vineyard. This is the time when changes can be made to the site to improve soil conditions, water handling, and the overall efficiency of managing the vineyard. Many experienced grape growers will say that investing the time and money in good site preparation will save both in the long run.

Planting a new vineyard

Planting Grapevines (Extension Foundation)

In most of the U.S., the best time to plant grape vines is very late winter or early spring. To ensure the highest quality vines and a specific cultivar or rootstock, order vines from a reputable nursery [1] in the summer or early fall prior to planting in spring. If you wait until January or February to order, you could have problems with plant availability and/or quality.

Planting Rootstock

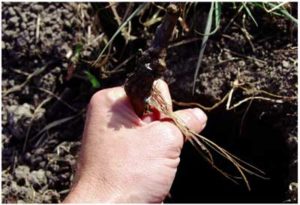
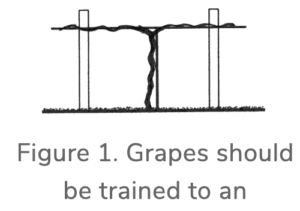
Planting Dormant Grapevines (WineMaker)

Establishing a vineyard is an exciting and rewarding adventure. Like all of life’s challenges, your success or failure will be dictated by the amount of research, planning, effort and perseverance you exhibit throughout the process. If you’ve read my last few articles you know one thing is certain — there’s a lot to do before putting vines into the ground.

Grape Rootstock Pic

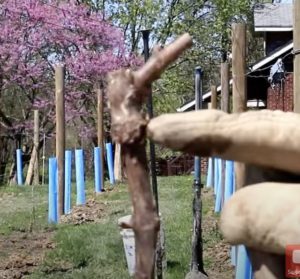
How to Plant Wine Grapes (The Home Winemaking Channel)

In this six minute video, I show how to plant dormant grape vines and start your own backyard vineyard. If you want to grow grapes in your yard, check out this video. The grapes that I am growing are Merlot, Cabernet Franc, Lemberger, Traminette, Riesling, Noiret, and Marquette. Most of the grape vines are grafted but a couple of the hybrids are own rooted.

First Year Vineyard Pic

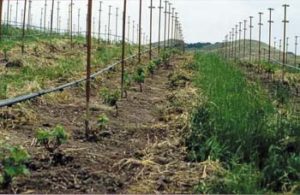
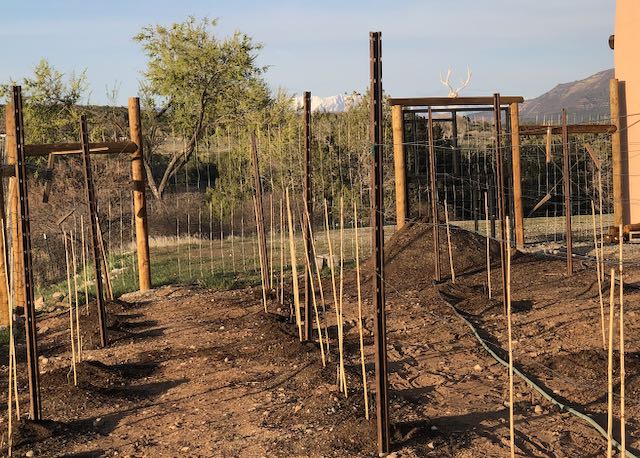
First Year Vineyard Care (WineMaker)

Planting a vineyard takes time, effort and planning. But your work is not over once the vines are in the ground. In order to have usable grapes by your third year, you’ll need to carefully manage the growth of your vines. The first year of vine growth is meant to establish a strong and vigorous root system and build stores of nutrients to hasten growth in subsequent years.

Cover Crops

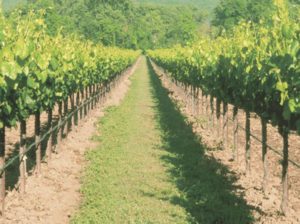
Cover Cropping Systems for Organically Farmed Vineyards (LODI Wine Growers)

Vineyard cover cropping practices have been refined over the past 15 years. Following multiple trials conducted by the author and cooperating growers, we have identified a broad “plant palette” from which to choose in addressing specific cultural issues in vineyards, such as protection from soil erosion while building soil structure, organic matter, and overall soil quality. 

Vineyard rows

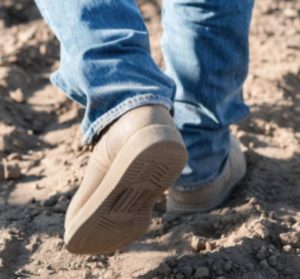
Weed Management in Organic Vineyards (UC Integrated Pest Management)

Weed control in vineyards enhances the establishment of newly planted vines and improves the growth and yield of established vines. Growers have many weed management tools available to achieve these objectives, which should be an integral part of an overall vineyard management system.

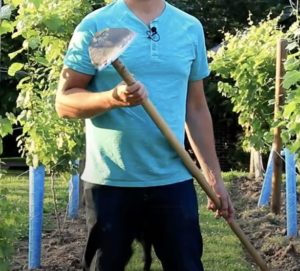
Weeding a Vineyard with a Grape Hoe (The Home Winemaking Channel)

In this three-minute video, I’ll illustrate the usage of my absolute favorite garden tool which is a tremendous help in the vineyard. It is my Rogue 7-inch Grape Hoe. These are similar to a normal garden hoe but much heavier, which allows you to dig into harder ground and chop weeds out easily.
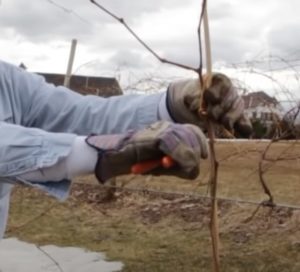
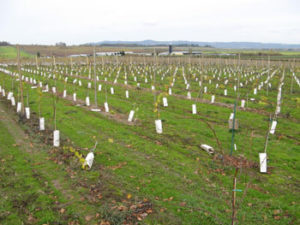
Pruning Backyard Grapevines in the First Three Years (Ohio State Extension)

Grape gardeners often become confused as to what should be pruned off and when. Proper pruning will help maintain a grapevine’s potential of producing a good quality fruit crop, develop good vine structure, increase sunlight exposure into the canopy, promote the development of next year’s fruiting wood, and potentially reduce disease and insect pressure.

Scroll to Top